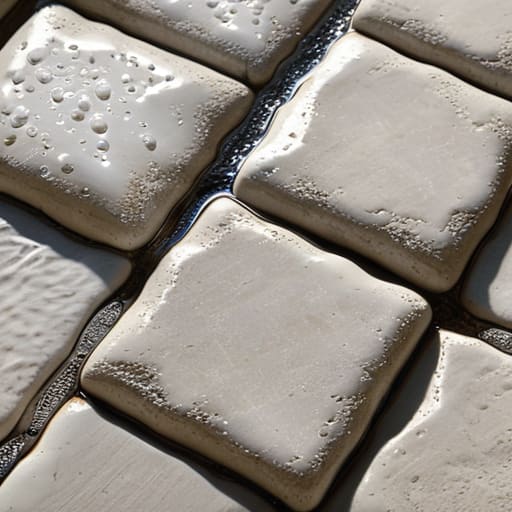
I was kneeling on a sun-drenched patio in Florence last spring, sketching the way the light hit a weathered terracotta walkway, when I realized something profound: we often obsess over the grand stones and the sweeping vistas, yet we completely neglect the delicate veins that hold them together. Most people think that once your grout turns a muddy, uninspired gray, the only solution is a harsh, caustic chemical soak that might as well be a death sentence for your stone. But I’m here to tell you that learning how to clean grout isn’t about aggressive destruction; it’s about intentional restoration. Just as I might carefully prune a stubborn hydrangea named Barnaby to let his true color shine, you can revive your surfaces without stripping away their soul.
In this guide, I’m stripping away the marketing fluff and the intimidating industrial checklists to give you a designer’s approach to maintenance. I’ll walk you through the most effective, eco-conscious methods to lift years of grime and bring back that crisp, intentional definition to your outdoor living spaces. We aren’t just scrubbing; we are reclaiming the artistry of your landscape, one line at a time.
Table of Contents
- Step-by-Step Instructions
- Whispered Secrets of Baking Soda and Vinegar for Grout
- The Best Tools for Scrubbing Grout With Intention
- The Architect's Touch: Five Nuances for Preserving Your Stone's Integrity
- Cultivating a Lasting Legacy for Your Stone Canvas
- The Soul of the Surface
- The Final Stroke of the Brush
- Frequently Asked Questions
Guide Overview
Tools & Supplies
- Stiff-bristled brush or old toothbrush for scrubbing
- Scrub brush or grout brush for larger areas
- Microfiber cloth or sponge for wiping
- Baking soda (1 cup)
- White vinegar (1/2 cup)
- Warm water (as needed)
- Grout sealer (optional, for post-cleaning)
Step-by-Step Instructions
- 1. Before we dive into the heavy lifting, I always like to clear the stage. Sweep away any loose debris or dust that might be hiding in the crevices of your patio or backsplash. Think of this as clearing your drafting table before you begin a new sketch; you can’t see the true lines of your design if they are buried under a layer of grit and urban dust.
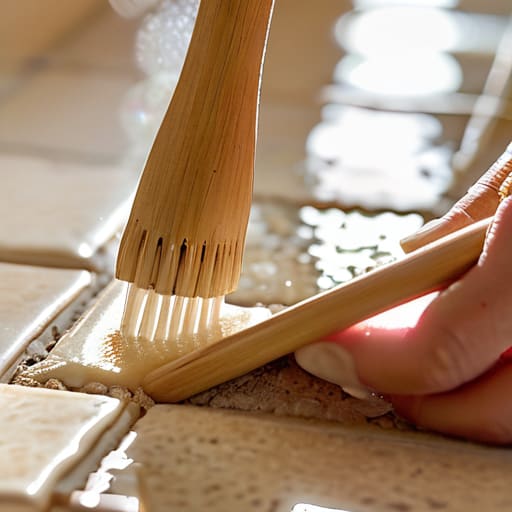
- 2. Now, let’s prepare our primary restorative elixir. I find that harsh, synthetic chemicals often feel too aggressive for the delicate balance of a living space, so I prefer a gentle, eco-friendly mixture of baking soda and warm water. Create a thick, velvety paste that holds its shape, much like the heavy-body acrylics my mother used to use when she painted the hills of Marin.
- 3. Apply this paste generously to your grout lines, working from the top down. As you spread the mixture, I find myself whispering encouragement to the stone, treating the process like I’m tending to a new seedling in a garden bed. Let the mixture sit for about ten to fifteen minutes; this gives the alkaline properties time to gently lift the stubborn stains from the deep pores of the material.
- 4. Grab a stiff-bristled brush—nothing too aggressive that might scratch your beautiful stone, mind you—and begin to work in small, circular motions. You aren’t just scrubbing; you are reclaiming the definition of your landscape. Focus on those areas where the shadows seem a bit too dark, ensuring the bristles reach deep into the heart of the grout.
- 5. Once the grime has been loosened, it’s time to rinse the canvas. Use a clean, damp sponge or a soft cloth to wipe away the paste and the lifted dirt. I always recommend using fresh, clear water to ensure you aren’t leaving any residue behind, which could attract new dust and create a cycle of grime.
- 6. For those particularly stubborn, “difficult” spots—the ones that seem to have a mind of their own—I occasionally add a splash of white vinegar to my solution. It provides a bit of extra zest to break through the buildup, but use it sparingly so you don’t upset the natural equilibrium of your stone surfaces.
- 7. Finally, once everything is sparkling and clean, take a moment to dry the area thoroughly with a soft microfiber cloth. A dry surface is a happy surface, and it prevents any lingering moisture from seeping back into the pores. Now, step back and admire how the rhythm of your design has been restored, allowing the true character of your outdoor space to shine once more.
Whispered Secrets of Baking Soda and Vinegar for Grout
When I’m out sketching in my journal, I often find myself thinking about the chemistry of the earth—how certain elements work in harmony to restore balance. The same logic applies to your home. If you’re looking to move away from harsh, synthetic chemicals, utilizing baking soda and vinegar for grout is like introducing a gentle, rhythmic tide to your patio or bathroom. I like to think of the baking soda as a soft, abrasive cushion that lifts away the grime, while the vinegar acts as the spirited catalyst that breaks down the stubborn mineral buildup. It’s a beautiful, symbiotic dance that respects the integrity of your stone.
However, a little word of caution from my design sketches: always test a small, inconspicuous corner first. While these natural grout cleaning solutions are incredibly effective, the acidity in vinegar can occasionally be a bit too bold for certain delicate marbles or limestone. If you are specifically removing mold from tile grout in a high-moisture area, let the fizzing reaction sit for a few minutes; it’s like giving the mixture time to whisper its secrets to the spores before you scrub them away.
The Best Tools for Scrubbing Grout With Intention
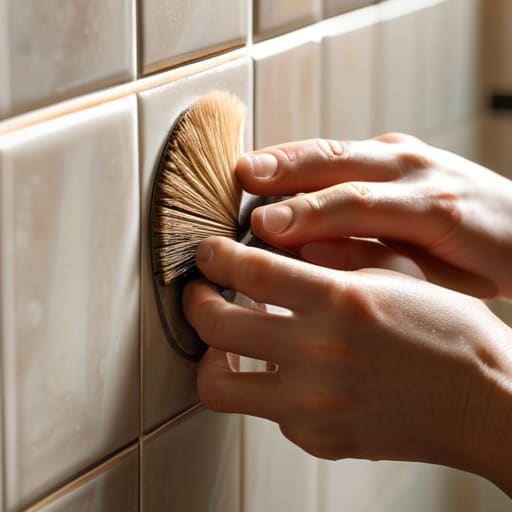
When you approach a project, I always say that the tools you choose are like the brushes an artist selects for a delicate watercolor; they dictate the soul of the final piece. If you are cleaning bathroom tile grout that has become weathered by time and moisture, skip the harsh, industrial-strength chemicals that can strip the life from your surfaces. Instead, reach for a stiff-bristled nylon brush. It offers enough grit to lift away stubborn residue without scarring the delicate edges of your stone or ceramic. I often find myself reaching for an old bamboo toothbrush for those tight, intimate corners—it’s much gentler on the “personality” of the tile, allowing you to work with precision rather than force.
For those deeper, more persistent battles, such as removing mold from tile grout in high-moisture zones, a small brass-bristle brush can be a game-changer, provided you use it with a light, rhythmic touch. Think of the scrubbing process as a meditative act of restoration. By selecting the best tools for scrubbing grout based on the specific texture of your canvas, you aren’t just performing maintenance; you are carefully tending to the very lines that define your outdoor or indoor sanctuary.
The Architect's Touch: Five Nuances for Preserving Your Stone's Integrity
- Respect the Porosity: Before you dive into a deep scrub, remember that grout is much more delicate than the tiles it cradles; think of it as the soft soil in a garden bed that needs gentle tending rather than a heavy plow.
- Test Your Palette: Just as I wouldn’t sketch a bold indigo wash on a delicate watercolor paper without testing it first, always apply your cleaning solution to a hidden corner to ensure it doesn’t bleach the soul out of your stone.
- Avoid the Chemical Overdose: It’s tempting to reach for harsh, industrial acids, but much like over-fertilizing a rare fern, too much aggression can erode the very structure of your grout, leaving it brittle and prone to crumbling.
- The Rhythm of the Scrub: Don’t rush the process with frantic, circular motions; instead, use small, intentional strokes that follow the natural lines of your design, much like the rhythmic way I sketch the contours of a new hillside terrace.
- Seal the Story: Once your grout is pristine and breathing again, treat it to a high-quality sealer—it’s like applying a protective varnish to a finished painting, ensuring the beauty you’ve worked so hard to reveal stays vibrant against the elements.
Cultivating a Lasting Legacy for Your Stone Canvas
Treat grout cleaning not as a chore, but as a ritual of preservation; by using gentle, eco-conscious ingredients like baking soda, you protect the integrity of your materials and the health of your outdoor sanctuary.
Precision is your greatest ally—select tools that respect the delicate lines of your design, ensuring you scrub with intention rather than force to avoid scarring the very surfaces you aim to revive.
Consistency is the heartbeat of a beautiful space; regular, mindful maintenance prevents the buildup of grime, allowing your patio’s story to remain vibrant and clear for years to come.
The Soul of the Surface
“Don’t look at grout as a chore to be conquered, but as the delicate connective tissue of your outdoor sanctuary; when we clear away the grime, we aren’t just cleaning—we are revealing the intentional lines that allow your stone paths and patios to finally breathe and speak their true colors again.”
Francesco Fletcher
The Final Stroke of the Brush
As we draw this process to a close, remember that revitalizing your grout is much like tending to a delicate garden; it requires the right tools, a bit of patience, and a gentle touch. We’ve explored how the humble magic of baking soda and vinegar can act as a natural balm for your surfaces, and we’ve identified the essential implements needed to scrub away the years without causing harm. By approaching these tasks with intentionality and care, you aren’t just performing a chore—you are meticulously restoring the structural lines that define your living space, ensuring that every tile and crevice contributes to a cohesive, beautiful whole.
Beyond the physical act of scrubbing, I hope you see this as an opportunity to reconnect with the environments you inhabit. Whether it is the patio where you host summer dinners or the stone path leading to your sanctuary, these spaces deserve to be treated with respect. When we nurture our surroundings, we cultivate a sense of peace within ourselves. So, take a moment to step back, admire the clarity you’ve restored, and let your home breathe again. After all, a well-tended space is a living canvas that invites us to dream, to rest, and to flourish alongside the nature we work so hard to protect.
Frequently Asked Questions
If I’m working with delicate, hand-painted tiles, how can I ensure my cleaning process doesn't strip away the character of the piece?
Oh, you’re handling treasures! When dealing with hand-painted tiles—those soulful pieces that carry the artist’s very heartbeat—you must move with extreme gentleness. Think of them as delicate companions rather than stubborn obstacles. Skip the harsh abrasives; they’ll bruise the glaze. Instead, use a soft microfiber cloth and a mild, pH-neutral soap. Test a tiny, hidden corner first. We want to lift the dust, not erase the history etched into the clay.
Is it safe to use these natural mixtures on older, porous grout, or am I risking a permanent stain on my patio's "canvas"?
That is a brilliant, cautious question—the kind of foresight that separates a true caretaker from a mere cleaner. With older, more porous grout, you are essentially dealing with a thirsty, delicate canvas. While my vinegar and baking soda duo is magic, vinegar’s acidity can be a bit too spirited for aged stone. I always recommend a tiny, hidden patch test first. If the grout feels particularly parched, stick to a mild, pH-neutral soap to protect its soul.
Once I've breathed new life into my grout, what can I do to protect it so I'm not constantly chasing away the grime?
Now that we’ve polished those lines, we must protect them—think of it as applying a gentle varnish to a fresh watercolor. I always recommend a high-quality penetrating sealer. It acts like a breathable shield, preventing moisture and grime from settling deep into the pores. Once you’ve sealed your paths, you won’t have to constantly battle the elements; instead, you can just sit back, sip some tea, and watch your garden thrive.